Upload the GIRO File to DBS Bank (V.1)
In Carbonate HR, payroll processing is automated. Basically, you only need to upload the GIRO file to DBS Bank and the Carbonate HR will do the rest.
Before generating the GIRO file, the bank details must be added to the system.
The outlet must also be created beforehand. Refer to the following user guides:
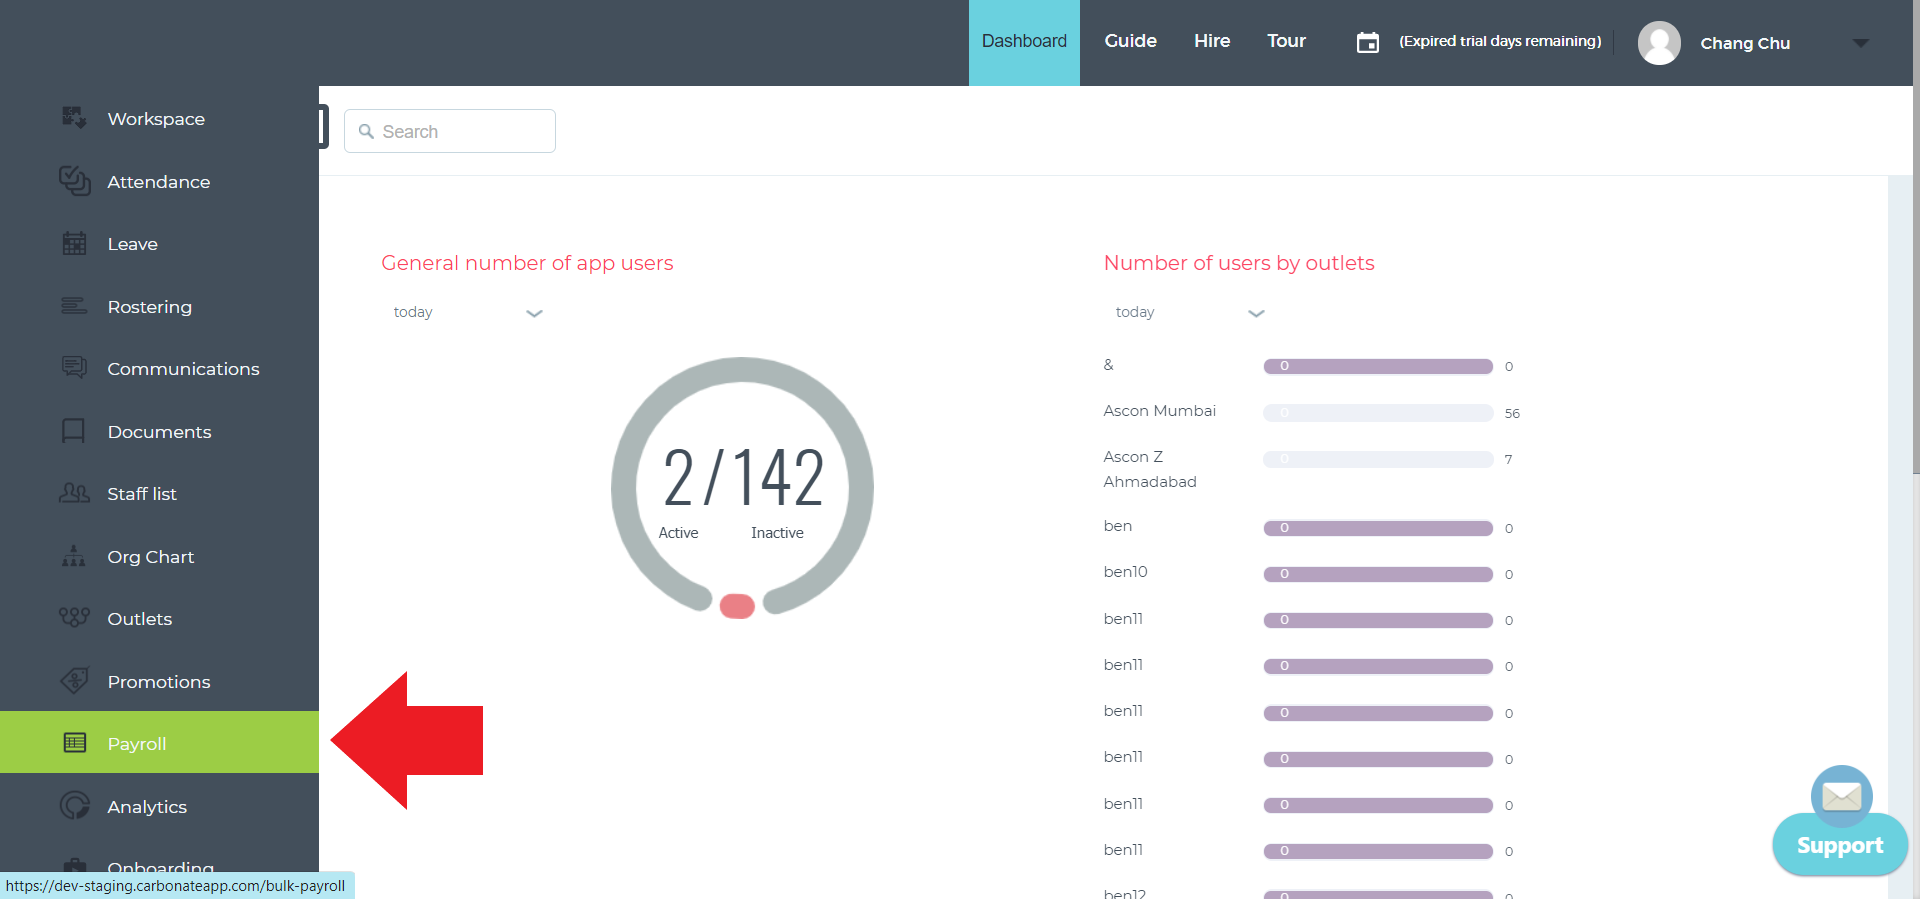
On the dashboard, go to the Payroll section.
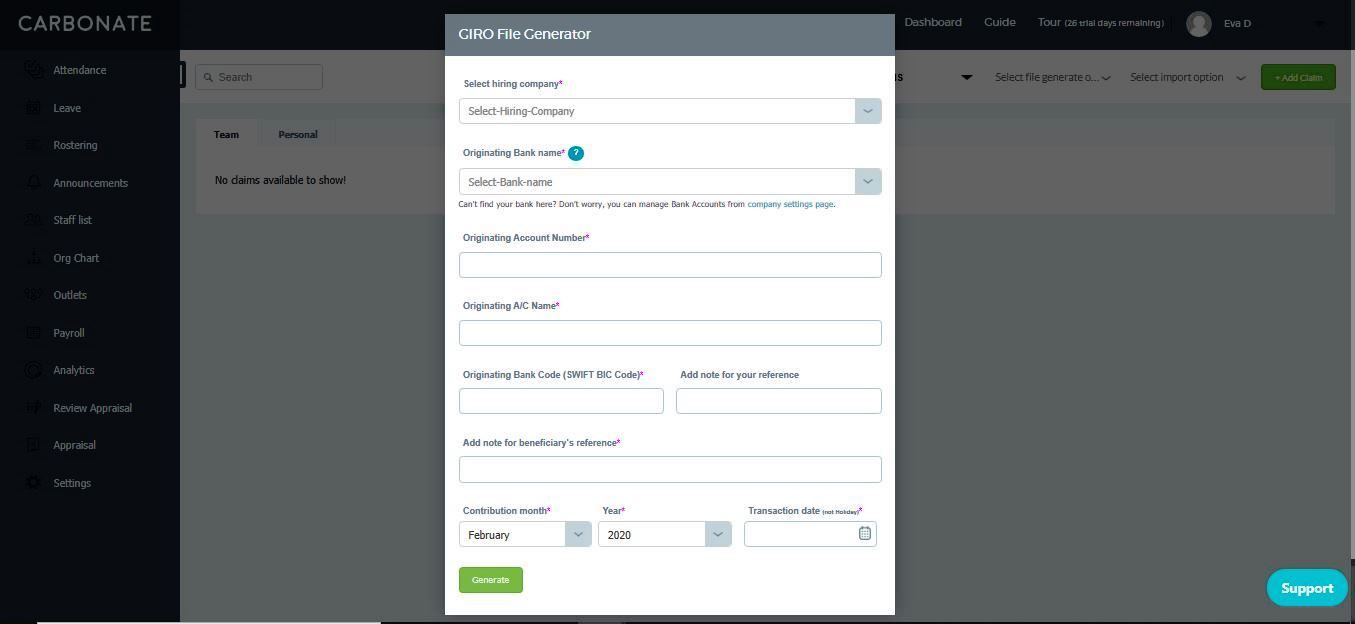
Choose Generate GIRO file on the drop-down menu as shown in the image.

Fill out all the required information on the pop-up GIRO File Generator page.
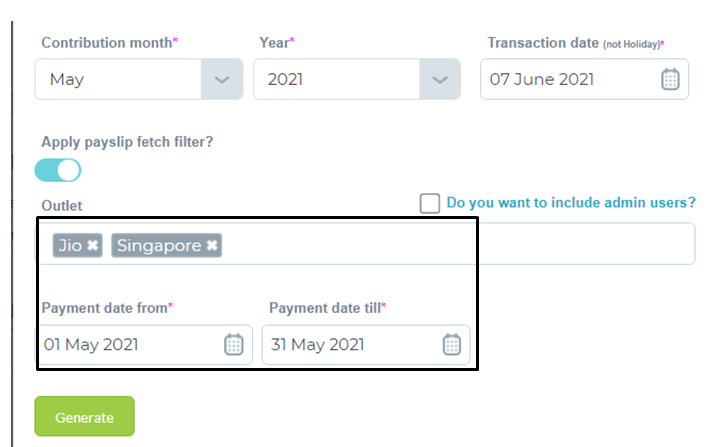
If you prefer to apply the payslip fetch filter, we can add the outlet and payment date details and the GIRO file will be generated accordingly.
Click the Generate button.

Login to DBS IDEAL and go to your IDEAL Dashboard.
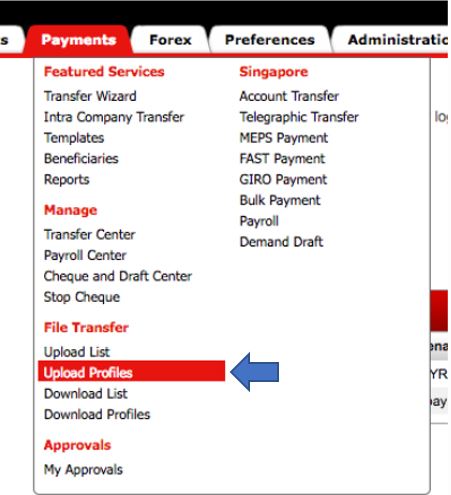
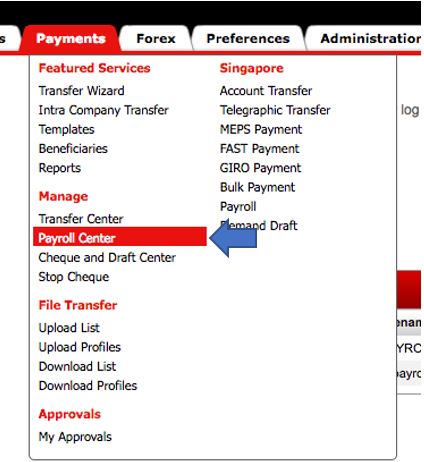
Click the Payments tab. Then, select the Upload Profiles from the drop-down list.
Click create new.

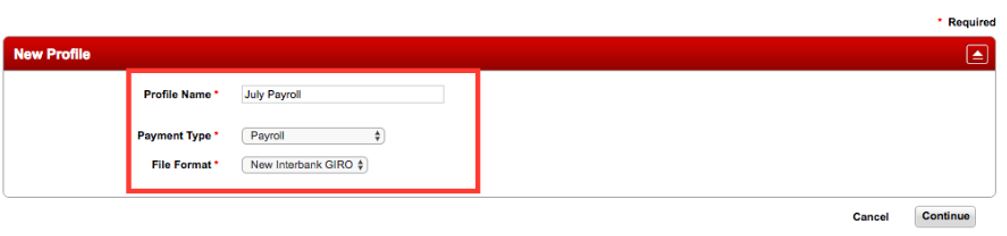
Give your profile a name, select payment type as payroll and file format as new interbank GIRO.
Click continue.
Check Allow Payment Date Override by clicking on the box next to it. Select Private – Only visible and usable for the creator as the Profile Access. Lastly, click on the Preview button once you are done.
Double-check your selected settings and click on Submit.

At the list page, Click on Select Action and click Execute.
Click Choose File and select the bank file downloaded in the previous section of this article.
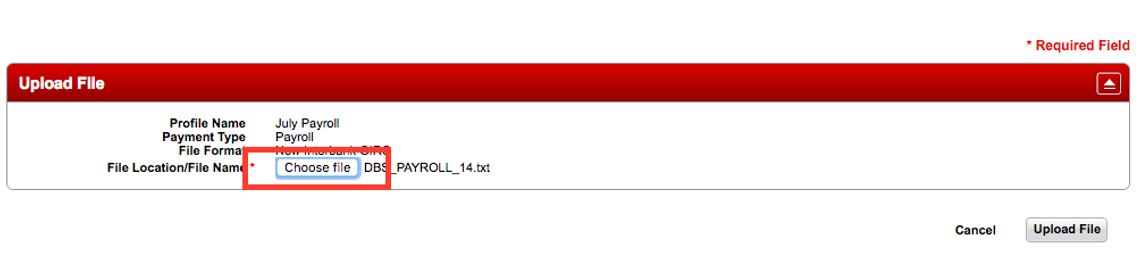
Click the Upload File button at the bottom-right corner of the box.
Click the Payments tab and select Payroll Center from the drop-down list.
Click on the Reference link.
Verify the payroll details and click on Approve at the bottom of the reference page.

Related User Guides