Generating Bulk Payroll
Payroll, not an issue anymore.
With Carbonate HR app you can do a bulk payroll in a few clicks. Instead of hours or days, the payroll can be done in a matter of a few minutes.
Before generating the bulk payroll, please make sure the basic salary is added to the staff profile.
Here is how you can generate a bulk payroll
Now before generating the payroll please make sure
- Claims are approved for the user.
- Over time compensations are approved for the user.
- In the staff profile please tick the CPF contribution, add the basic salary, and in the identification add DOB, nationality, race, and other details.
Click on the Payroll on the left-side menu.
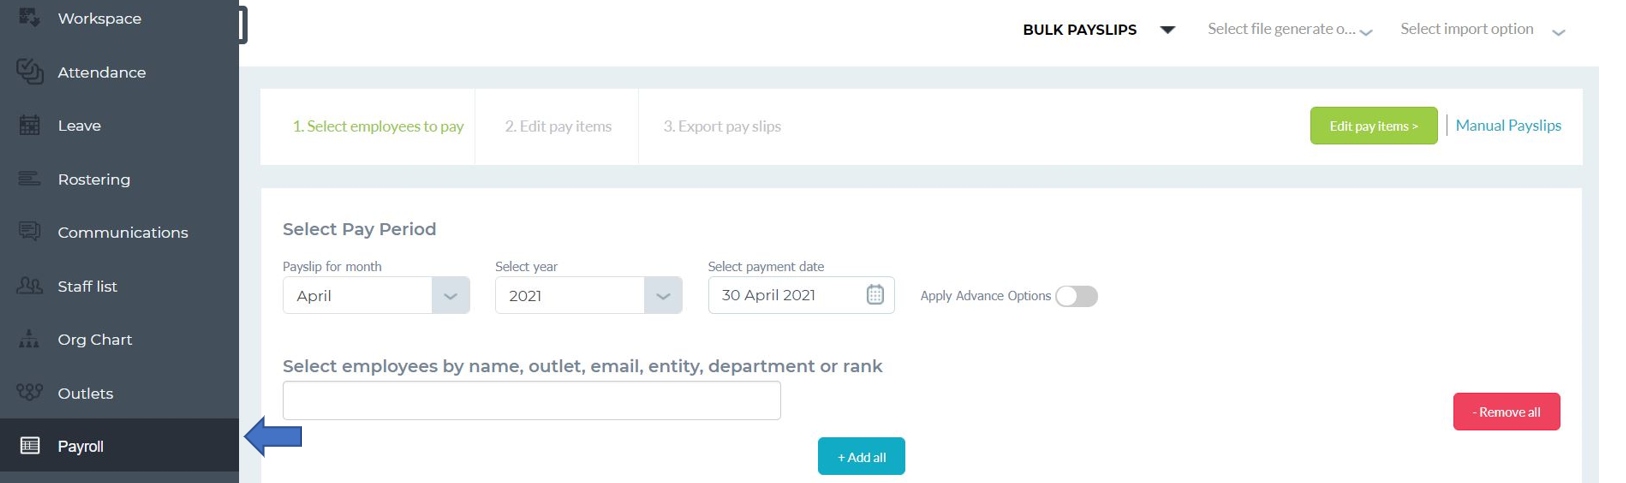
Select the month for which you want to generate the payslips.
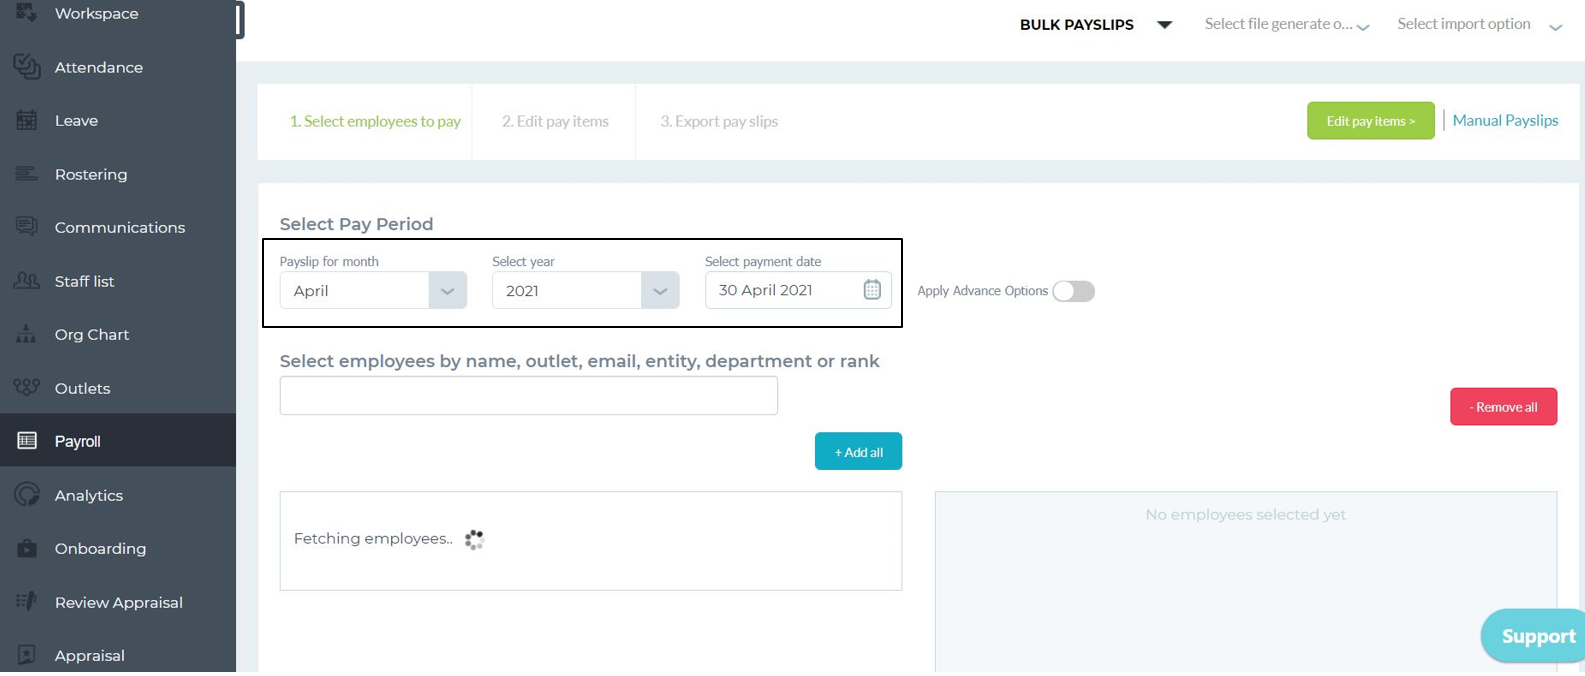
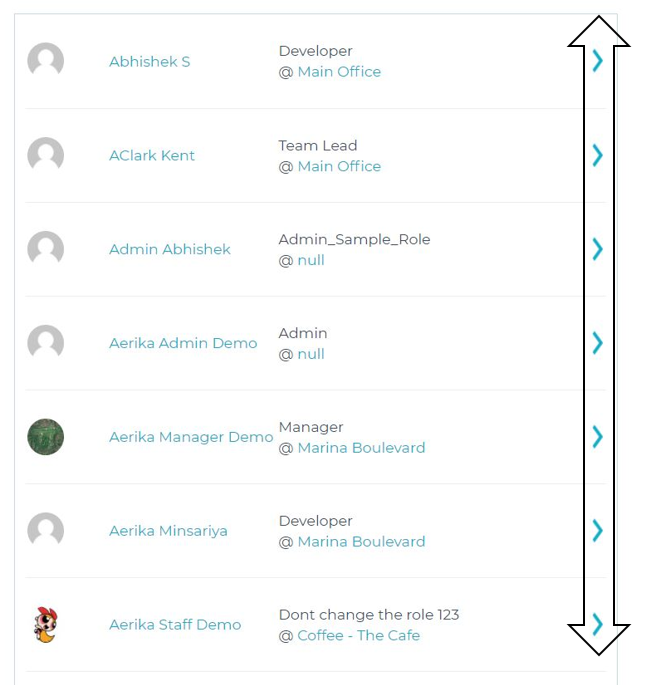
You can Add all employees to the list or you can create payslips for the selected employee.
Once you have a final list of the employees, click on edit pay Items at the top of the page.

There are a total of 5 tabs,
- Fixed allowances/deductions
- Other allowances/deductions
- Post CPF additions/deductions
- component selector
- Review payslips
You may add/deduct different types of allowances, Commissions, overtime, etc. on these tabs.
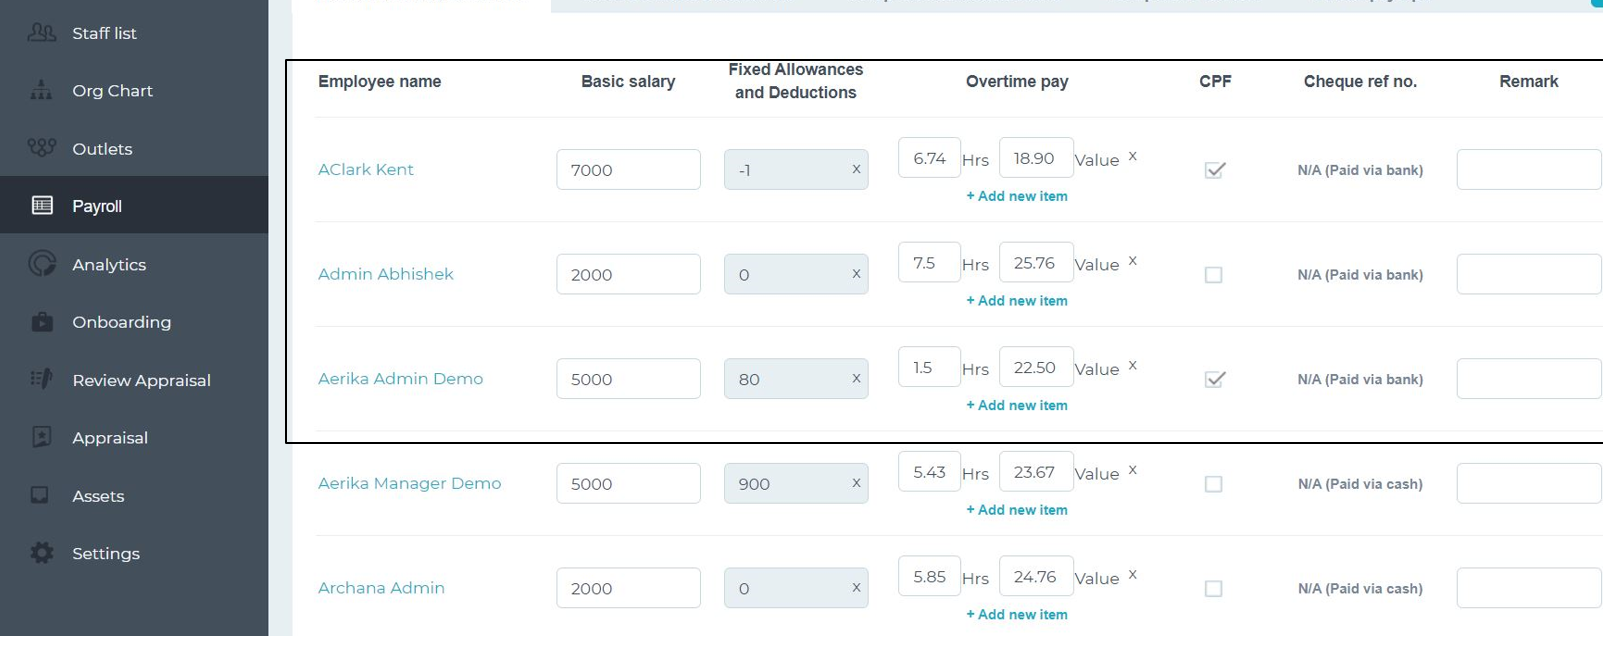
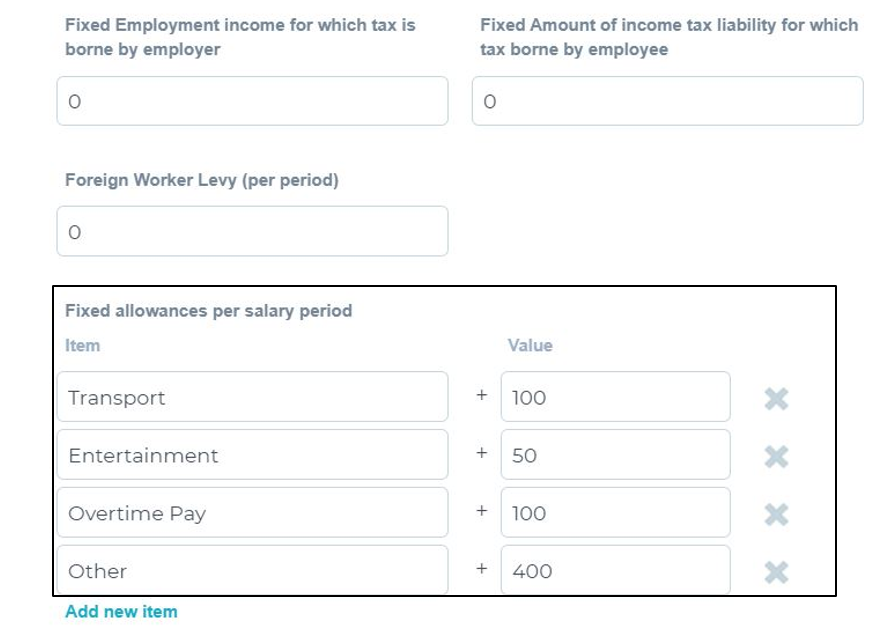
In this section, you will see all the fixed allowances (Claim, food) and overtime compensation.
You can also do custom additions or deductions from the salary on this page.
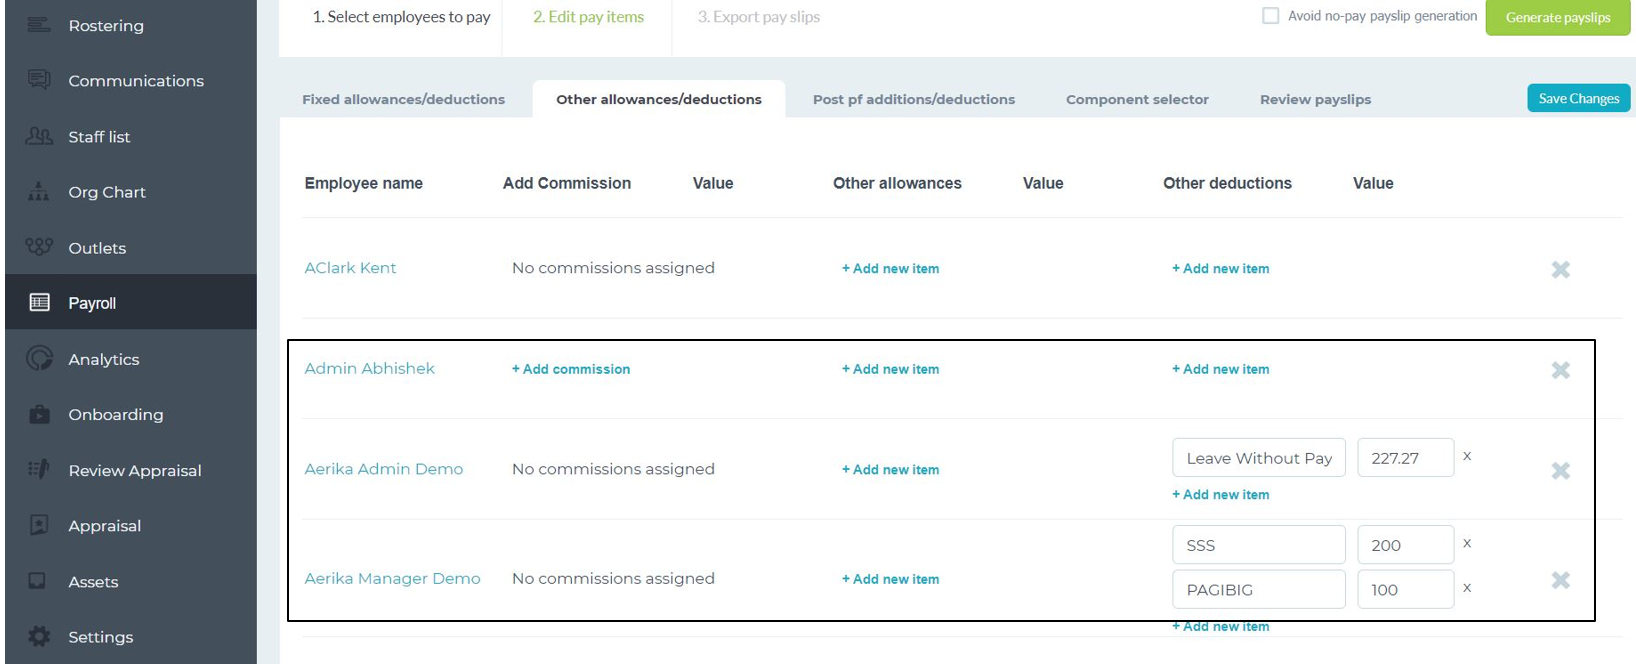
On this page, you can add commissions, additional salaries, bonus, Director fee, gratuity, notice pay, etc. You can also do the deductions on this page, for example, short attendance, special insurance, accommodation charges, penalties etc.
You can also do custom additions or deductions from the salary on this page.
“Note that this section is for the income which is subjected to CPF and income tax.”
In this section, you will see all the approved claims, SHG contributions (CDAC, MBMF, SINDA, etc.)
You can also do custom additions or deductions from the salary on this page.
“Note that the amounts shown in this section are NOT subjected to CPF and income tax.”

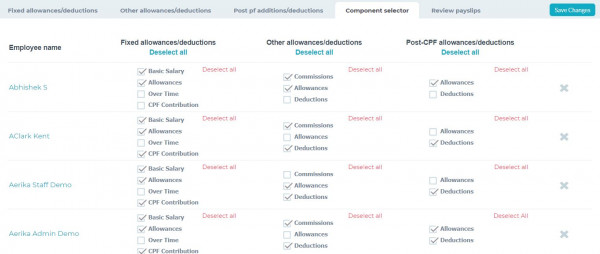
In this section, we can select/unselect the payroll components that should be visible in the payslip.
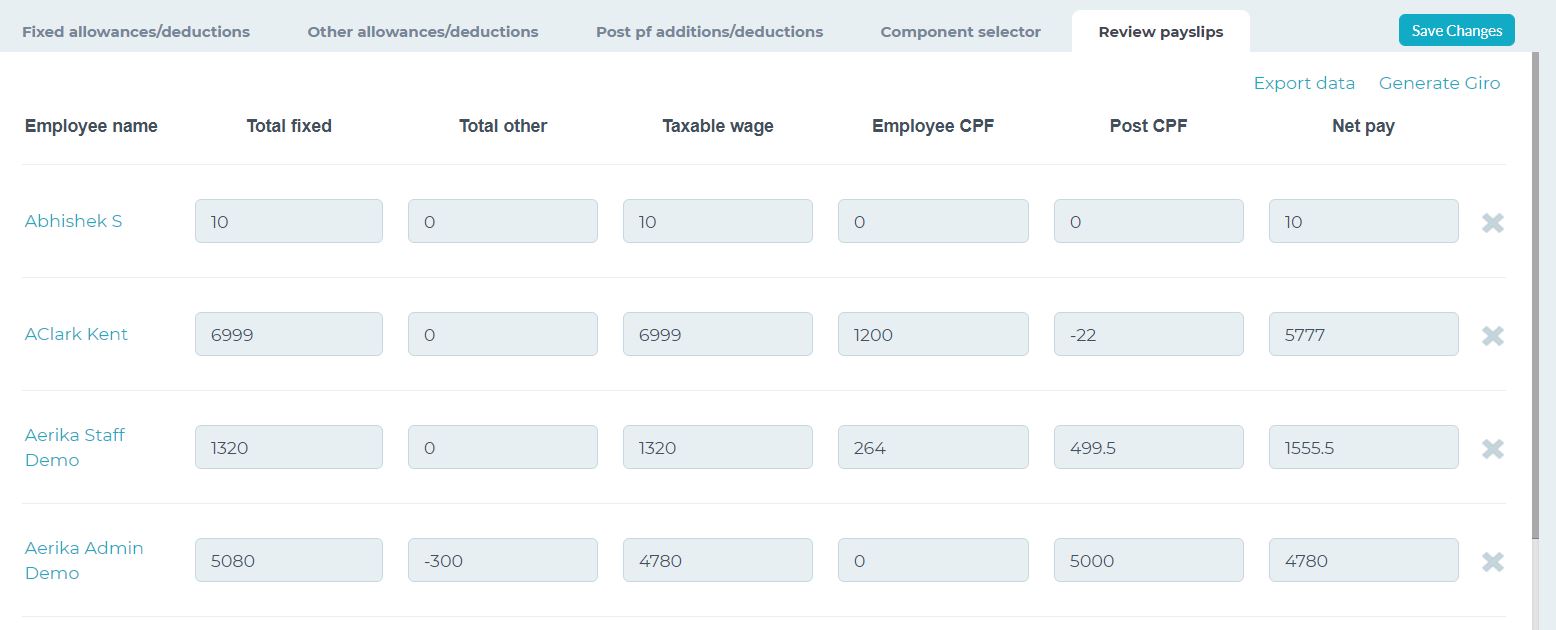
On this page, you will see a summary of the payroll of all the staff.

You can also export payroll data based on variables in Review payslips tab.
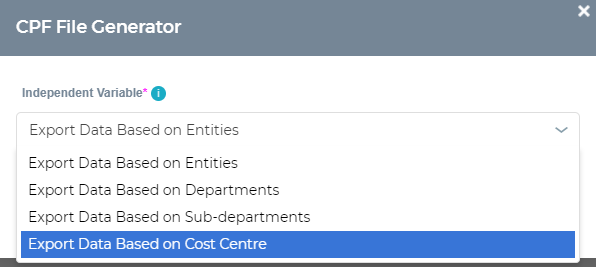
While exporting you can select the “independent variable” which allows exporting payroll data based on variables like –
- Export data based on entities
- Export data based on departments
- Export data based on sub-departments
- Export data based on cost centre
Click on Export.
The report will be generated based on the selected variable.

Before you proceed to generate the payslips, you may download the summary of the payroll for your reference or cross-check the breakdown of all the payrolls of each staff.
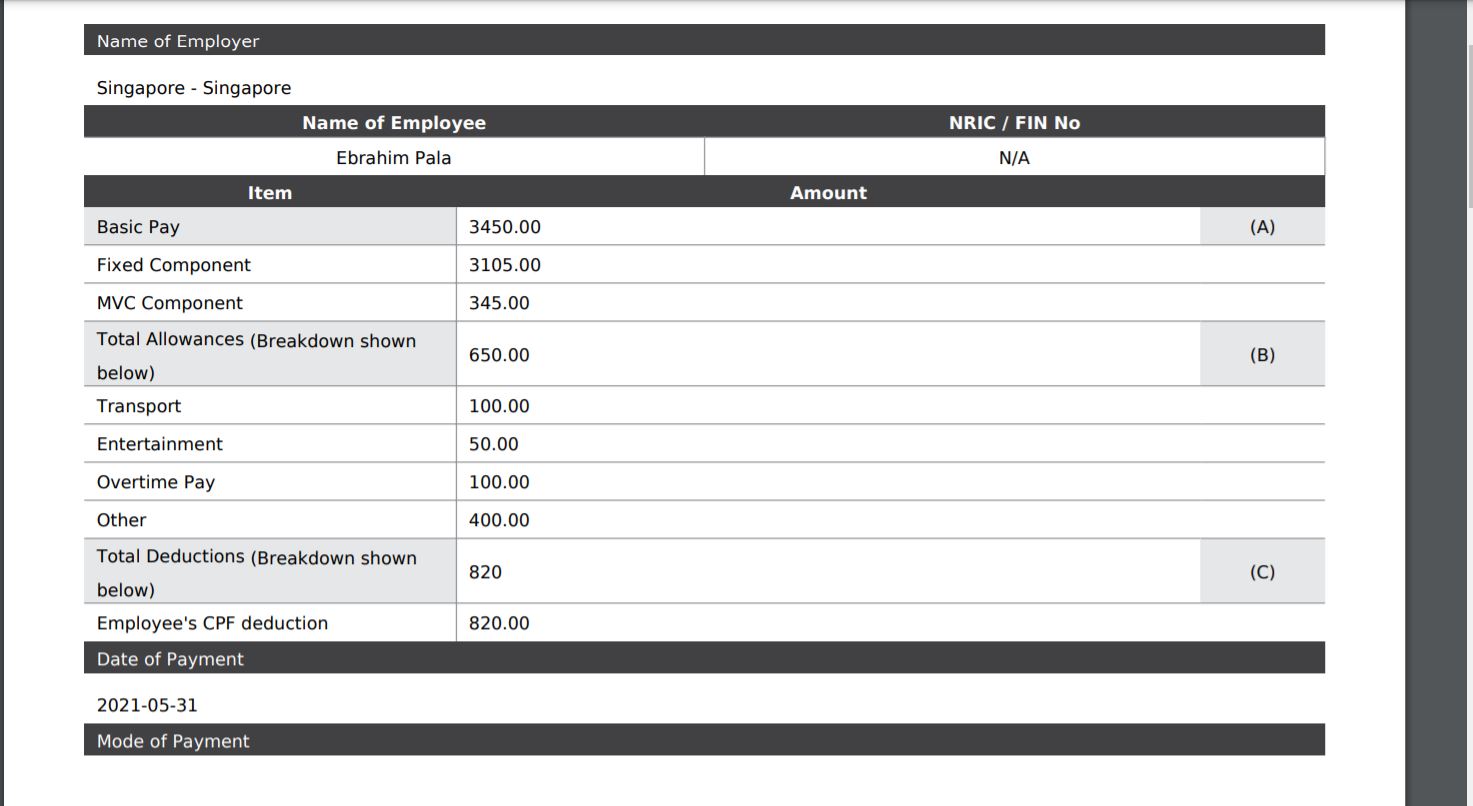
Click on Generate payslips at the top right of the page to view all the payslips.

Click on Download All to download the payslips.

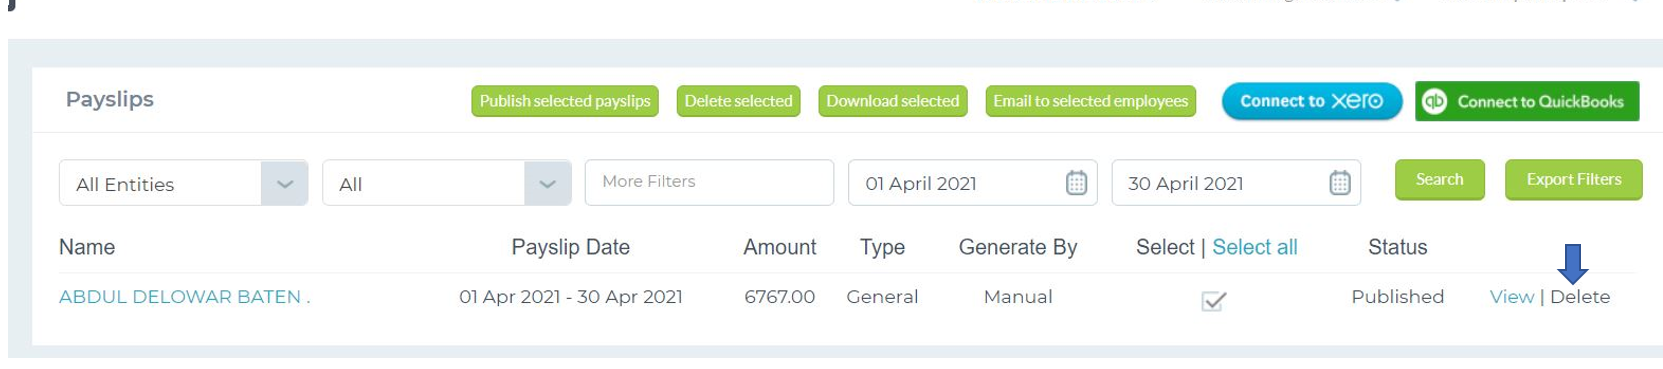
If any payslip is incorrect, go to Payslips History, look for the payslip by applying the filters and click on the delete button in front of the payslips you wish to delete. After deleting the incorrect payslip(s), please proceed to regenerate the payslip with the correct values.
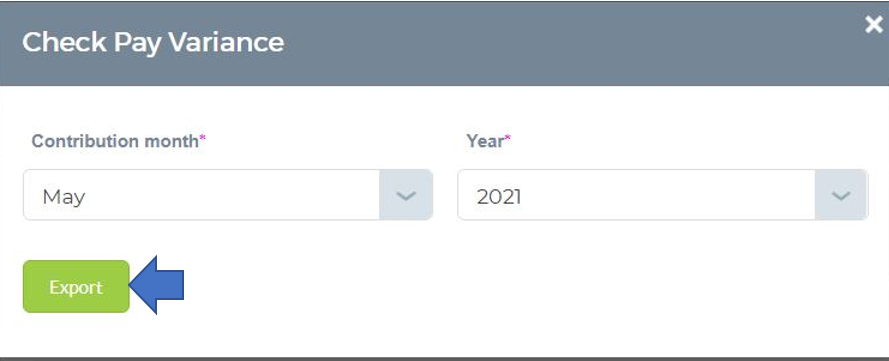
We can also calculate pay variance for the user by selecting the contribution for the previous month.
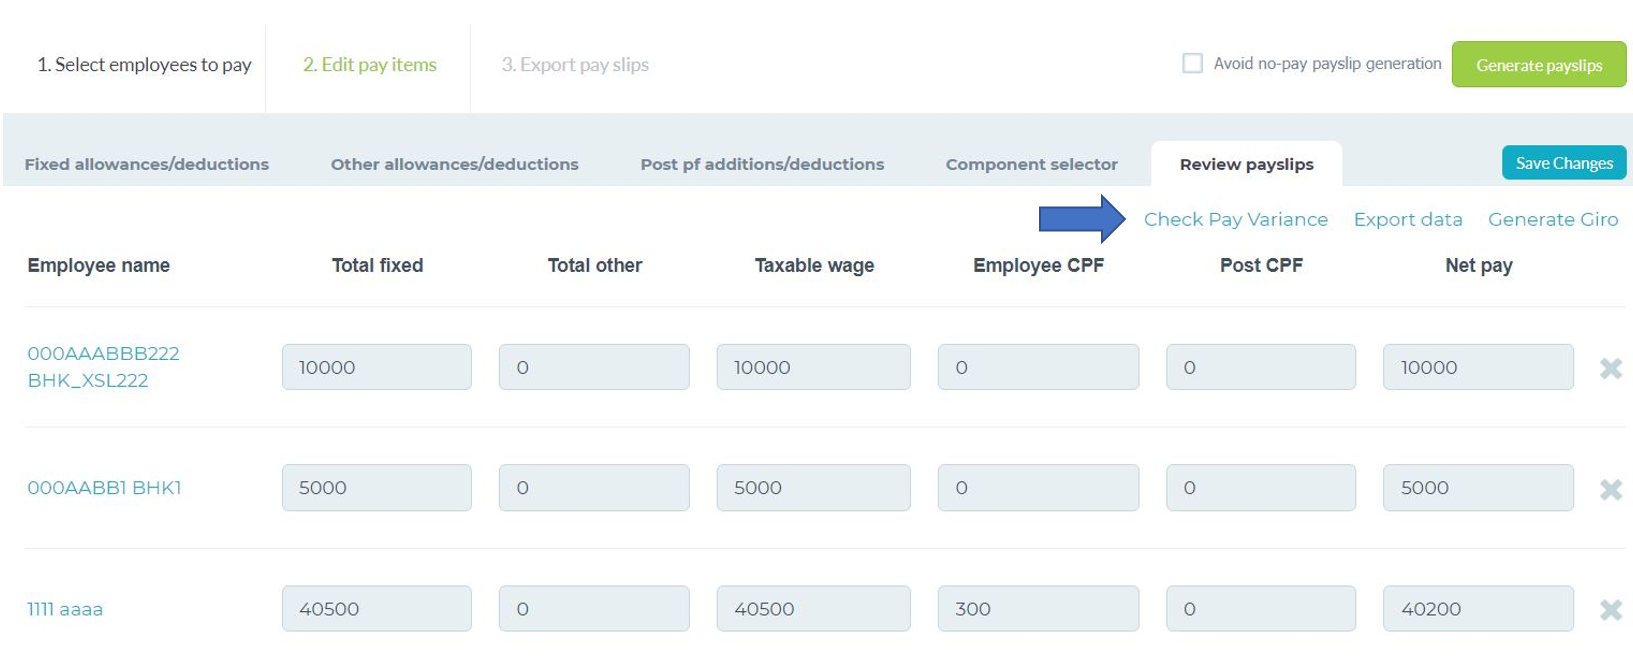
Click on the export button to check the pay variance.
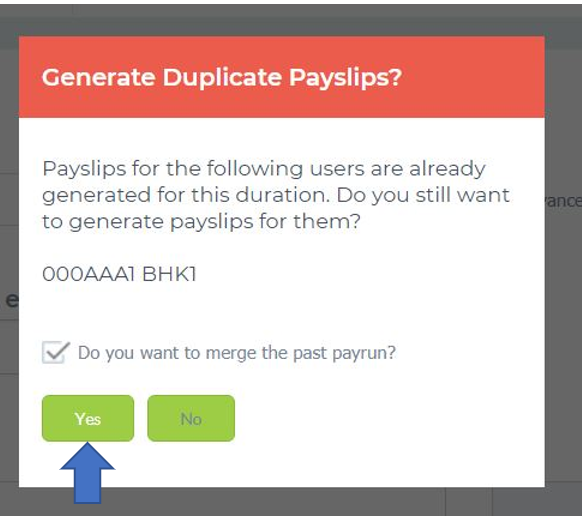
- If you wish to run your payroll in multiple batches, then the system can merge the old payslip with the updated one once you click on edit pay items after selecting the user under bulk payroll.
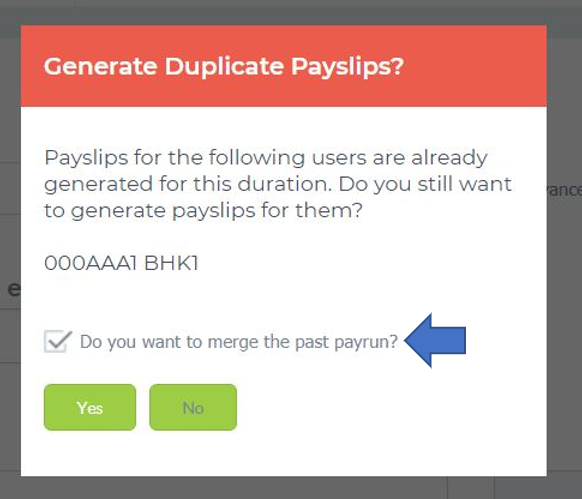
- In this case, if we merge the payslips then CPF will be calculated as per the merged total for the user.
We can also show the MVC component in the payslip for the user.
Kindly add the variable component under the employment tab of the staff profile.
Once the payslip is generated you can view the MVC component for the user.
- Note: Once the payslip is generated we can generate the YTD report.
- We can generate and submit the cpf.
- We can generate the bank giro file.
- We can also submit the IR8A file.
Related User Guides