Navigate the Company Settings
Under Company Settings, you have the following settings:
Simply log in to Carbonate with your credentials.
Input the official Company Name. It will appear in documents generated from Carbonate so it would be best if it is the official name.
Upload the company logo which can be in .jpg, .jpeg, .png format.
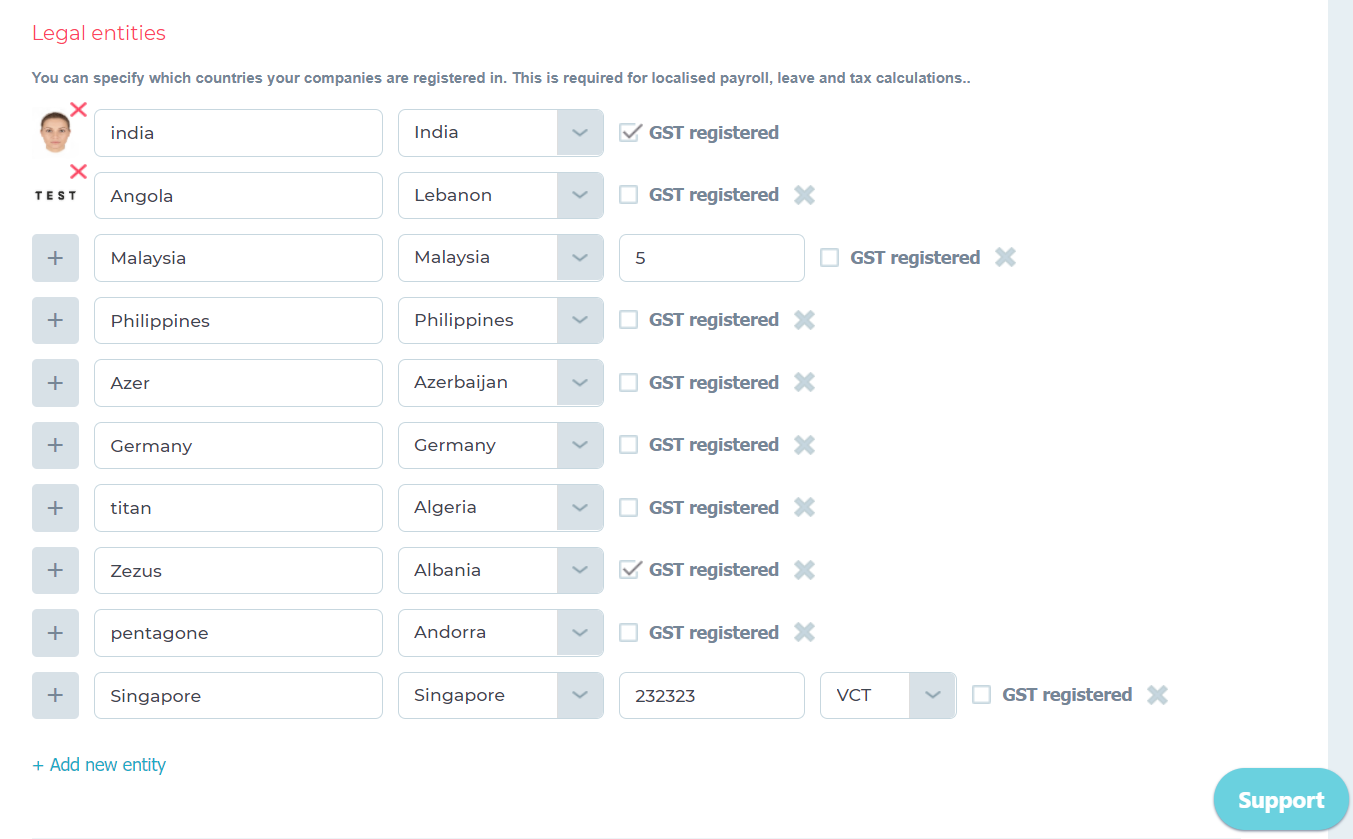
Specify which countries your companies are registered in for localised payroll, leave and tax calculations.
Multiple companies can be set up within one Carbonate account. It will automatically apply the rules of the country selected from the dropdown list.
For example, if the company is operating in Singapore, we will need to provide a UEN number and type of business entity (VCT, LTD or AMS).
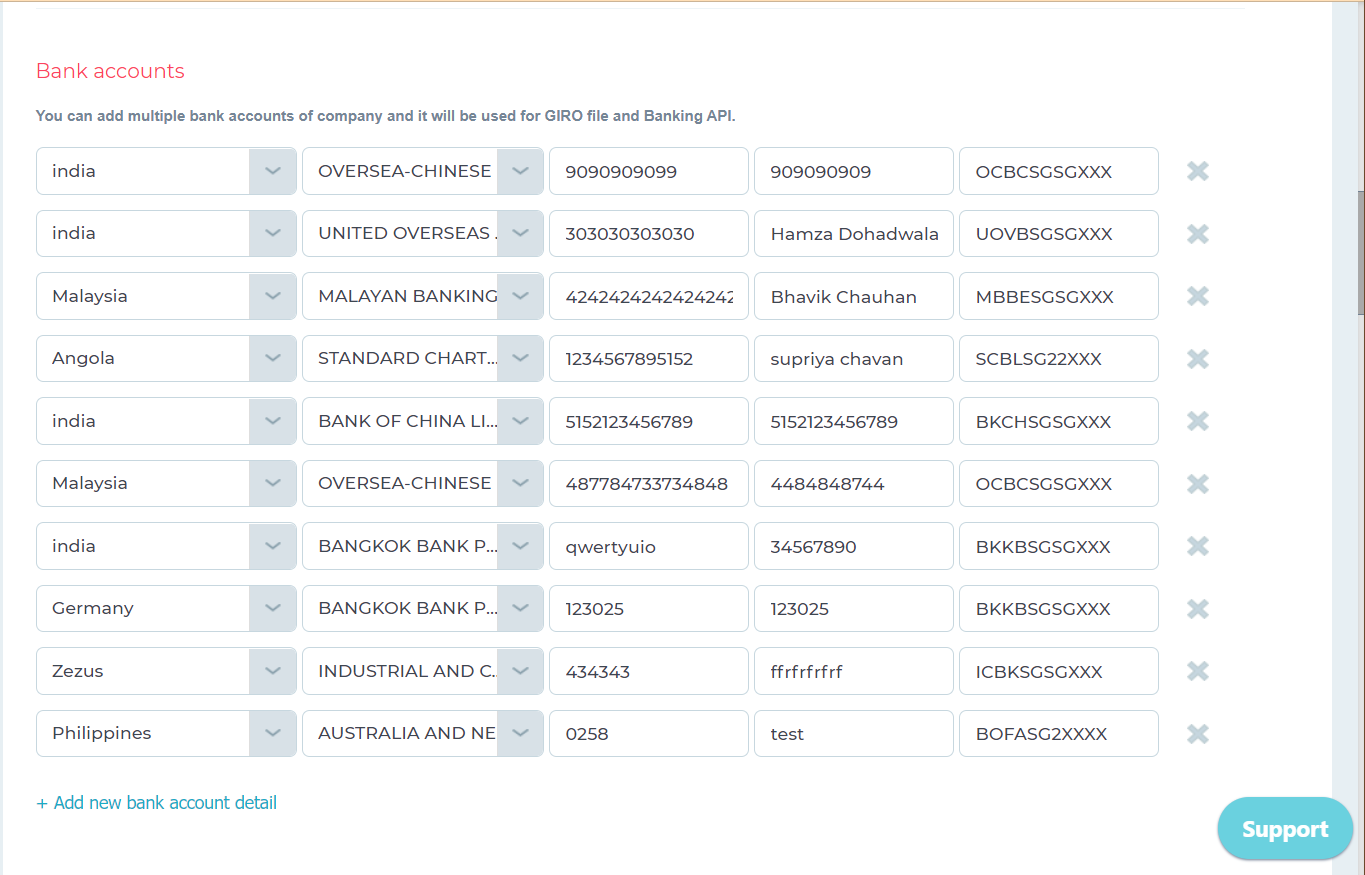
Add multiple bank accounts of the company for GIRO file and Banking API.
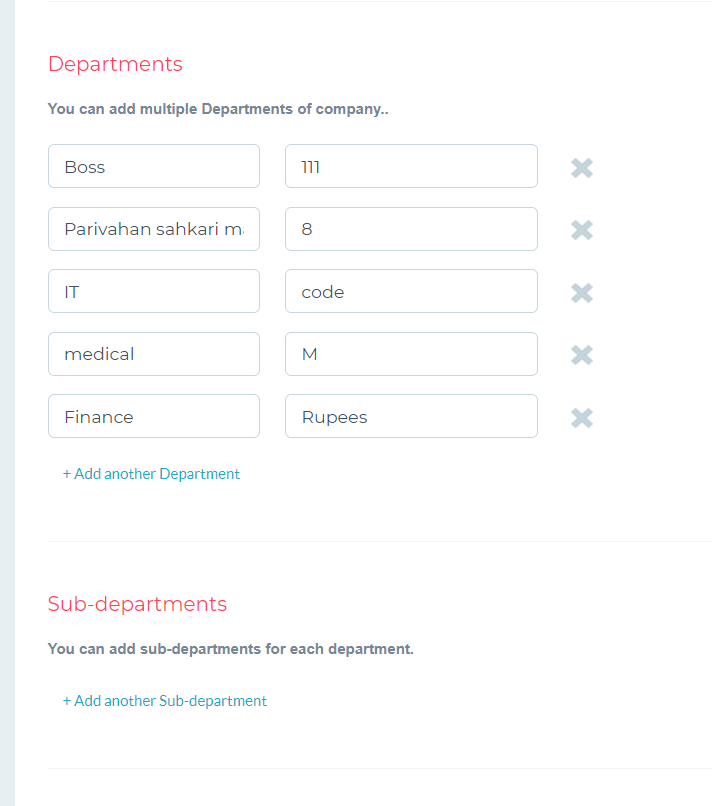
You can add multiple Departments of the company as well as add sub-departments for each department.
You can create an employee rank, which helps you to assign leaves based on a rank.
You can add the outlet or cost centre. If the company operates various branches, outlets, offices, then adding the cost centre makes it easier when processing payrolls, leave, etc.
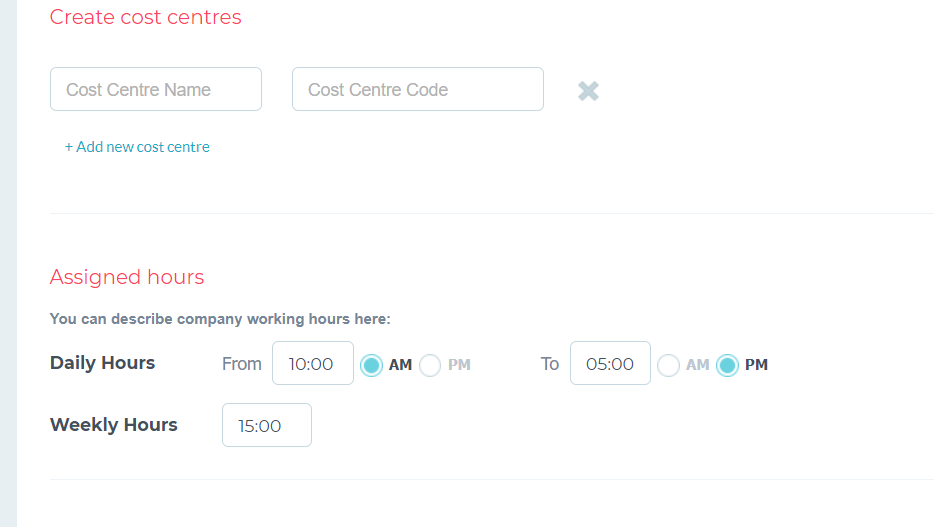
You may choose to provide daily working hours or weekly working hours.

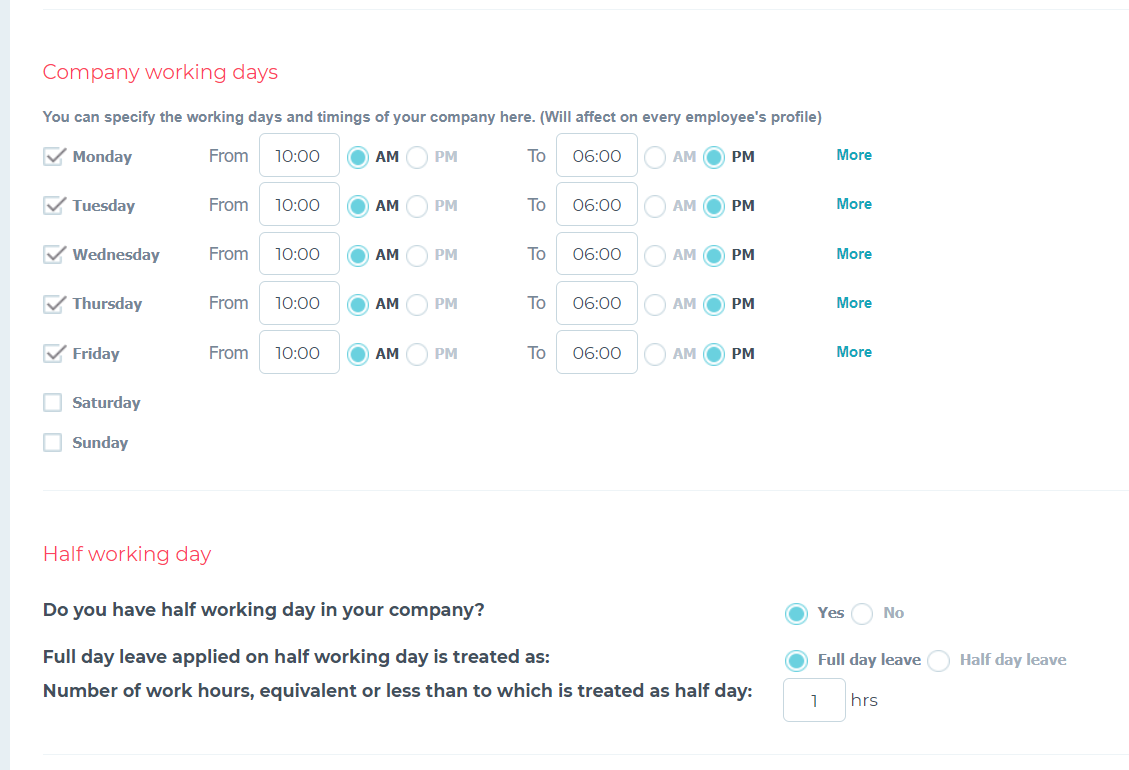
You can specify the working days and timings of your company here.
You can specify company policy on the half working days.
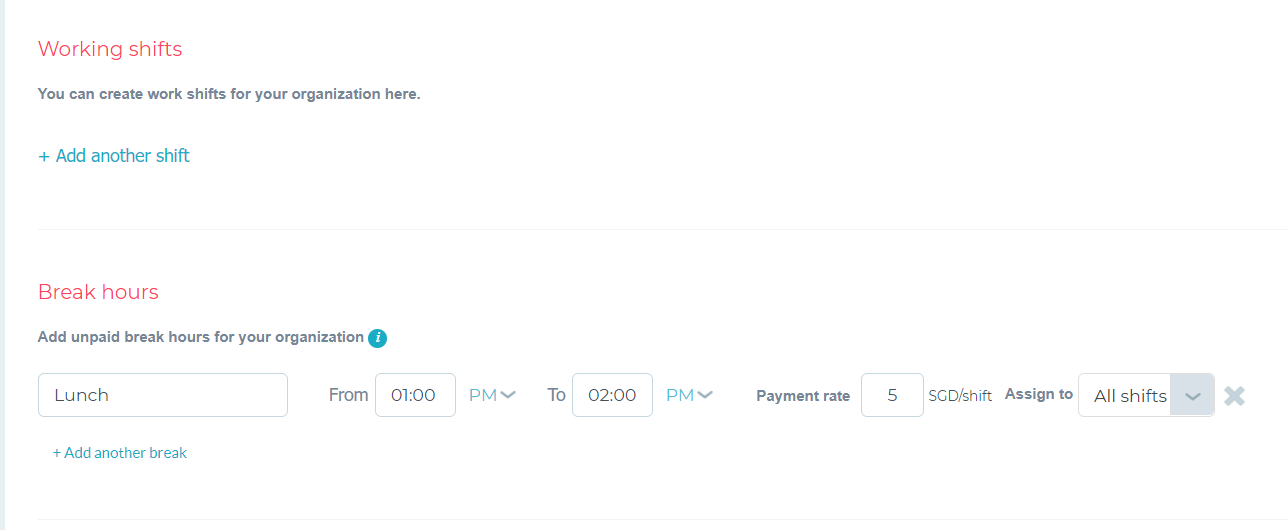
You can create work shifts for your organization here.
You can also add unpaid break hours for your organization.
Two Factor Authorization. Tick the respective box to enable or disable two-factor authorization.
Automated Generation of Employee Number. Tick the respective box to generate Employee’s Number automatically.
Third-party integrations. Tick the respective box if you want your account to be integrated with 3rd party applications.
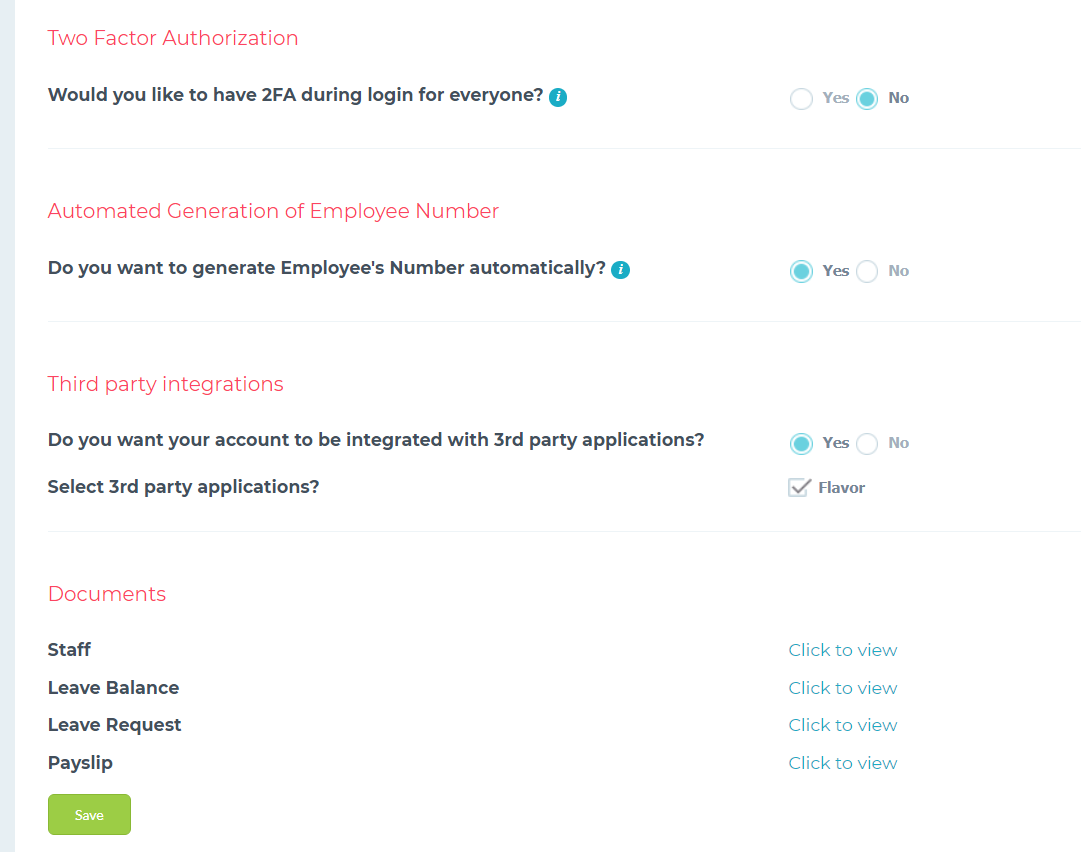
Once done, click Save button.
Related User Guides